How to update the CloudWatcher sensor firmware using the Solo CW over SSH, for units with pressure and humidity sensors.
Open a browser and navigate to:
http://aagsolo/cgi-bin/cgiLastDataLook at the second line; it will read something like cwinfo=Serial: 1452, FW: 5.71. Note the version: the update can be performed 100% remotely on units with firmware 5.71 or newer, and the procedure is slightly different if the current version is earlier than 5.71.
Download the latest firmware file and place it in the Solo's /tmp folder. You can use the shared network folder (\\aagsolo\tmp) to copy the file across from Windows.
Please note: that file is vers. 5.8.6, for users with the Pres+RH sensor. For other firmware versions, check the software and other downloads section of the CloudWatcher.
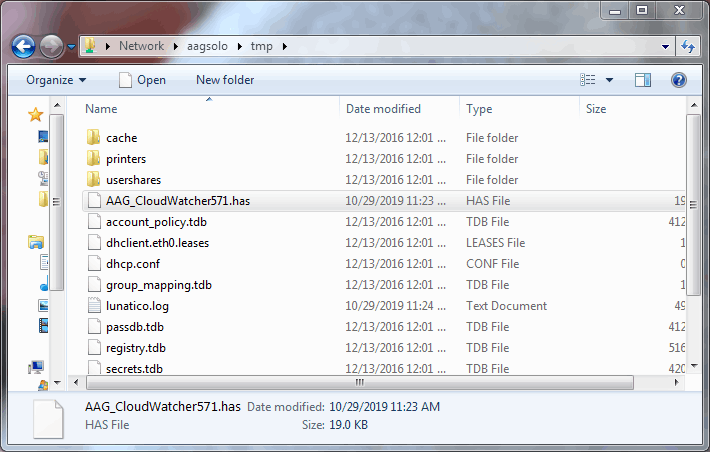
tmp share. The other files there belong to the system—leave them alone.Windows 10/11: Open PowerShell and type:
ssh pi@aagsoloWhen asked whether to trust the host, answer yes.
Older Windows: Download PuTTY ↗ and connect to aagsolo.
Credentials: username pi, password cloudwatcher
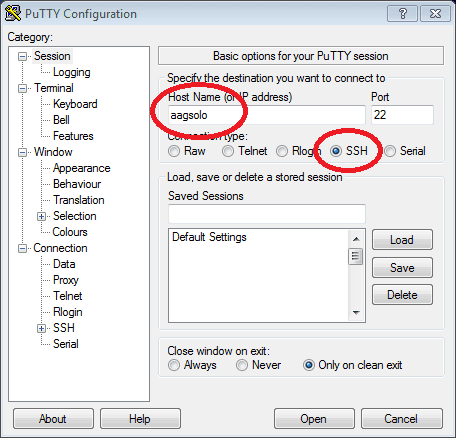
aagsolo and the SSH connection type.cd /tmp
sudo service aagsolo stopIf your unit has firmware earlier than 5.71:
Power off your CloudWatcher — not your Solo! — and leave it off while you launch the command below.
For a Solo with serial cable connection:
/home/aagsolo/HASFileLoader update f=AAG_CloudWatcher.hasFor a Solo Model R (USB connection):
sudo /home/aagsolo/HASFileLoader update f=AAG_CloudWatcher.has s=/dev/ttyUSB0You will see some messages, then dots appearing every second. At that point, power your CloudWatcher on — the loader is waiting for it to start up. Do not wait until the end of the procedure.
If your unit has firmware 5.71 or newer — no power cycle is needed.
For a Solo with serial cable connection:
/home/aagsolo/HASFileLoader resup f=AAG_CloudWatcher.hasFor a Solo Model R (USB connection):
sudo /home/aagsolo/HASFileLoader resup f=AAG_CloudWatcher.has s=/dev/ttyUSB0In both cases, all going well, you will see a list of numbers increasing in hundreds, up to 9728:
HAS file will be [AAG_CloudWatcher.has]
Updating device...
Read 19456 bytes from file
X0
100
200
300
(many more numbers)
9700
9728 Done
At this point the CloudWatcher is updated.
sudo service aagsolo start
exit
Some early Solos do not seem able to update the firmware; if that's your case, I'm afraid there's nothing we can do, you'll have to resort to the Windows tools.
