Why control the fan from Seletek?
Telescope cooling fans — used on large Newtonians, SCTs and other telescopes with significant thermal mass — help the mirror reach ambient temperature faster. The catch is that vibration from the fan affects seeing while it is running, so the fan must be turned off before imaging or focusing.
By connecting the fan cable to the Seletek, you can automate this: switch the fan on well before the session, and let a software rule — or a manual button click — turn it off when the temperature probe confirms the mirror has equilibrated.
Cable and wiring
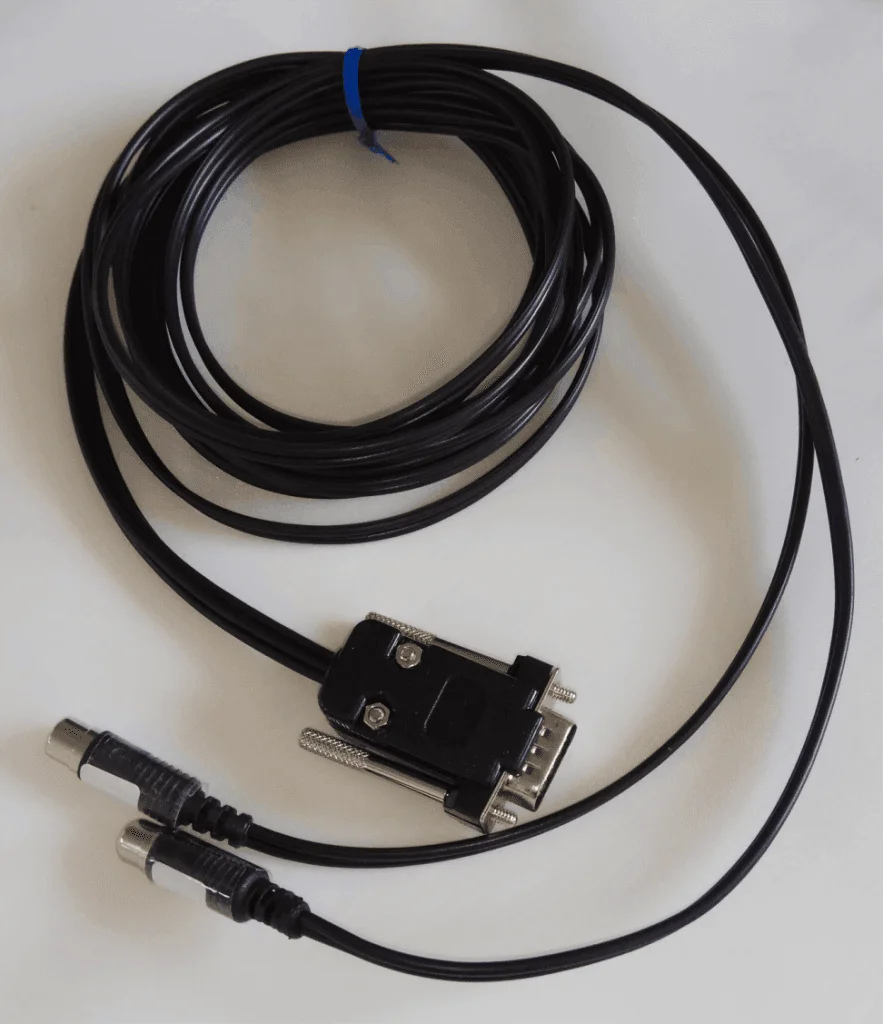
The fan cable typically has two conductors — positive and negative — connecting to the fan's 12 V supply. Route these through the Seletek's relay or switched output:
- Connect the fan's positive wire to the NO (Normally Open) contact of the Seletek relay.
- Connect the fan's negative wire to GND.
- Connect the 12 V supply to the relay's COM terminal.
When the relay closes, the fan receives 12 V and runs. When the relay opens, the fan stops.
Fan mounting

Position the fan at the rear of the optical tube, drawing air across the primary mirror cell. For Newtonians, a fan on the bottom of the tube pulling air out gives good laminar flow. For SCTs, use the mirror fan fitting at the rear cell if available.
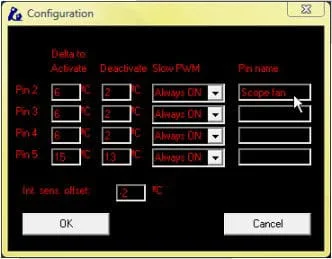
Temperature-driven control
Connect a temperature sensor to the Seletek's temperature input and configure a relay rule: when the temperature delta (mirror − ambient) exceeds a threshold, switch the fan on. When the delta falls below the threshold, switch off. This gives fully automatic cooling without any manual intervention during an imaging session.
Turn off before imaging: Even at low power, fan vibration degrades image quality. Add a 5-minute cooldown rule before any ASCOM focuser move or sequencer step that involves imaging.