
Congratulations on having acquired a PocketCW2. Let's get you started right away! These are the steps you should follow to set up your device for the first time.
- Unpack your PocketCW2. Be careful not to touch the sensors.
- Install the latest CloudWatcher software and the USB drivers on your computer. You can find them at software and other downloads.
- Plug your PocketCW2 into the computer using a USB-C cable.
- Execute the Windows software, and select that this is the master installation. The program will prompt you to select the appropriate COM port. If you are unsure of which one it is, you can select any and press "Test Port" to check if it can be opened (although this does not ensure that it is the one your PocketCW2 is plugged into). If you need to access this setting again, you will find it in the Setup tab, Device side tab.
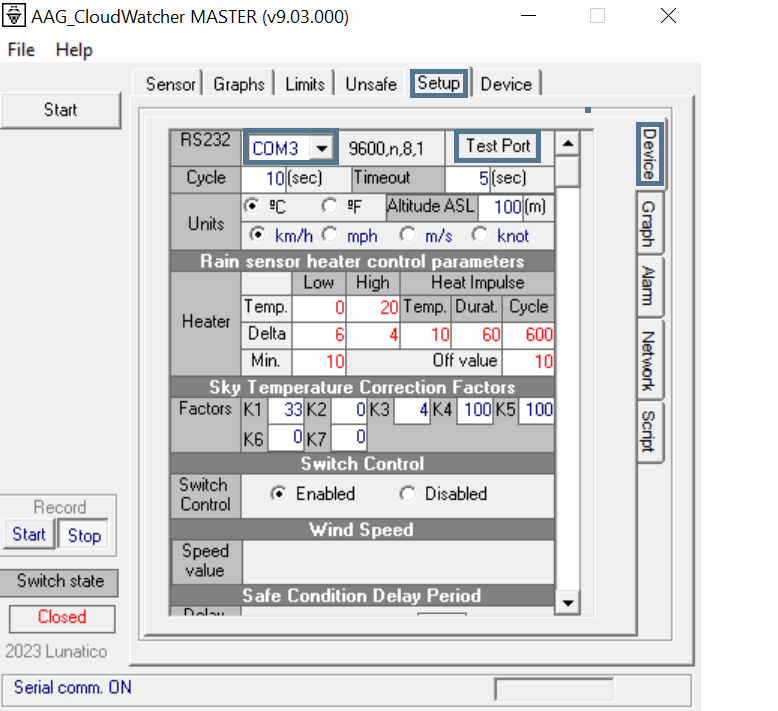
If you can't figure out which port your PocketCW2 is plugged into, look for a new CP210x device in Windows' Device Manager, under the Ports (COM & LPT) section.
- Press "Start". The connection might take a few seconds, but no more than that, until the data is displayed.
- Set an offset for the temperature readings to account for the fact that in the PocketCW2, the humidity sensor (which is used for the ambient temperature readings) is inside the device and hence exposed to its internal heating (unlike with the CloudWatcher). About 5ºC should be enough.
- Change the SQM darkness reference value, in the Setup tab, Device side tab, to 20.0.
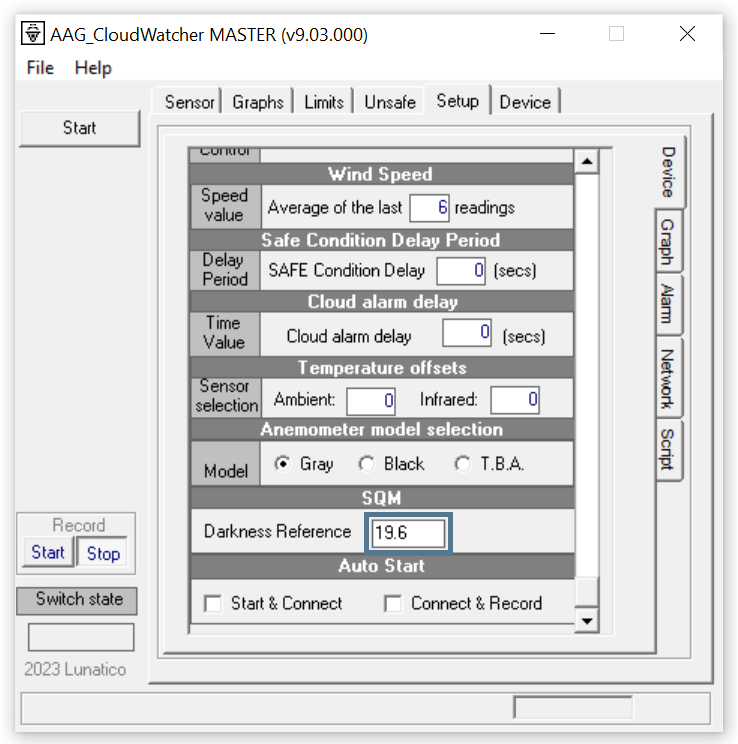
- …and that's it! You are ready to go. All that is left for you to do now is change any other settings you deem necessary, sit back, and relax while the PocketCW2 monitors the weather conditions for you 🙂
If you require additional information to operate your PocketCW2, please refer to its manual, to our forum, or ultimately, reach out to us at support@lunaticoastro.com, and we'll be happy to help you out. We hope you enjoy our product!