
- Run
Setup.exe. - Start the program.
- The program will prompt you.
- Select "No" for REMOTE installation.
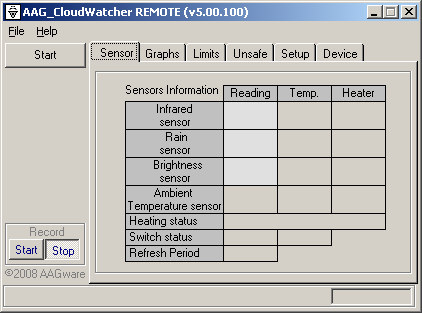
- The program will display its main window:
- Select the Network section of the Setup tab:
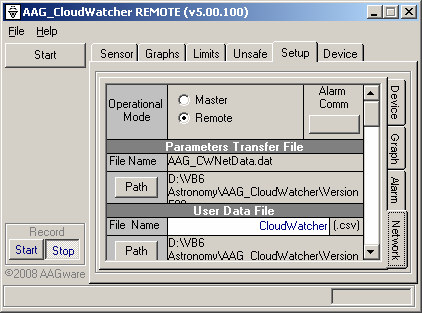
- Select the path for the Parameters Transfer File that corresponds to the share defined in the MASTER installation, by pressing the corresponding "Path" button.
- You may program Alarm Comm with a sound file by right-clicking with the mouse over the alarm button. This alarm is fired when the information is older than the timeout defined in the Device section of the Setup tab.
Check the Device section of the Setup tab:
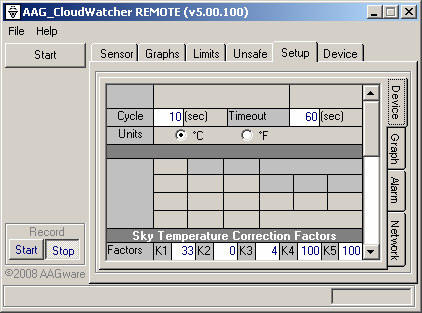
- Set a Read Cycle similar to that used for the MASTER installation.
- If the information from the MASTER is older than the timeout period, the system will issue a warning and fire the Alarm Comm under the Network section of the Setup tab (if it is programmed and activated).
- Use identical Temperature Correction Factors K1, K2, K3, K4 and K5, similar to those used in the MASTER installation.
Check the Graph section of the Setup tab:
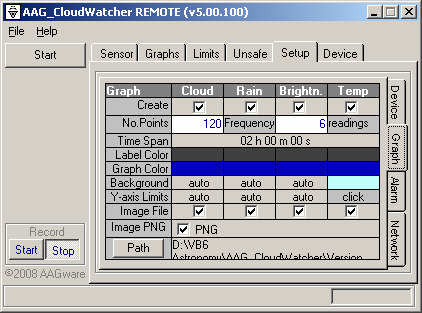
- Adjust the graph time span by adjusting the number of points and frequency. The total graph span is given by: Total Span = (No. of Points) × (Frequency) × (Read Cycle).
- Use PNG image files rather than JPEG—they are smaller in size and have a higher quality.
Setting up the computer that the CloudWatcher is actually connected to? See MASTER installation.