
Setting up your Starling should be an easy process. If you own a Dragonfly, you can probably skip ahead—the wiring conventions are the same.
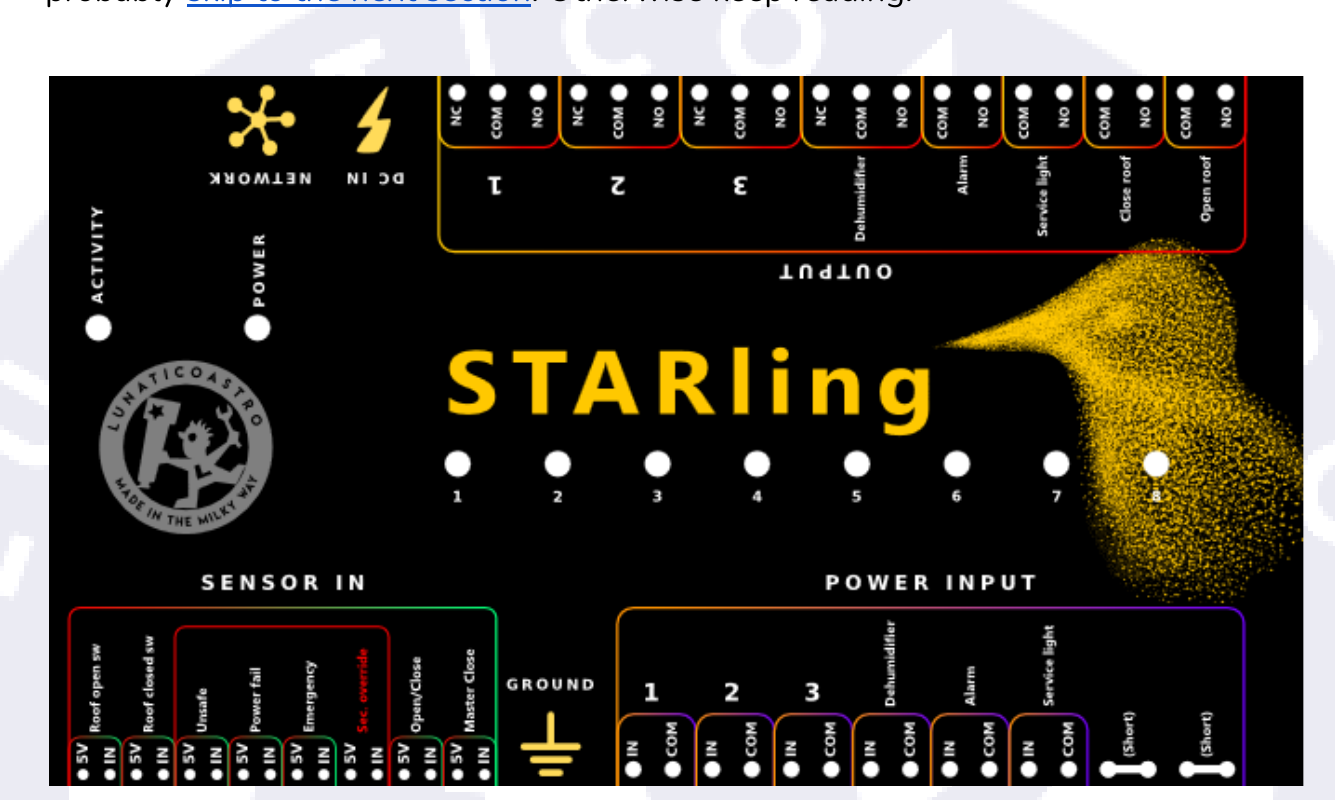
The Starling's sticker aims at making the setup process as smooth as possible. At a glance, we can see all the sensors, as well as most of the relays (outputs) and power inputs, have labels. Since it's designed with shared observatories in mind, these features will be common to most of them, and the device has been designed accordingly (although it is possible to accommodate it to different setups).
2.1. The sensors
The first two sensors are straightforward—they should be the open and closed sensors of our roof.
The four sensors inside the red box are associated with the safety of the observatory. The unsafe sensor can be connected to a safety monitor (say, for example, the CloudWatcher), power fail can be connected to a relay that remains open while it's receiving power, and the emergency sensor can be connected to a manual switch to activate an alarm or some other device. By default, any of these being active will trigger the closing of the roof. The security override sensor enables you to override this behaviour. Depending on your setup, you may wish to hook this up to a physical button or switch, or something you can access remotely (there is, however, a remote security override setting that can be toggled from the web server or sent as a command through the API).
Lastly, we have the open/close sensor, which should be connected to a push button (a switch can do the trick too, but then it will have to be toggled and untoggled to mimic a push button) to open or close the roof, and the master close, which forces a close. In both cases, the command will be enforced regardless of what other connected clients have selected (more on this in the control panel section).
2.2. Power inputs and outputs
Let's now take a look at how to connect the rest of the devices mentioned in the sticker. Current, be it AC mains (max 240V) or DC from a battery or power supply, will enter the Starling via the power inputs and will be blocked or routed to the output side.
The internal wiring is as follows:
- "COM" will be internally routed from the input to the output side, always.
- "NO" (Normally Open) will be connected to "IN" when the relay is closed by the software.
- "NC" (Normally Closed, only available in the extra relays and the dehumidifier) will be connected to "IN" when the relay is open in the software.
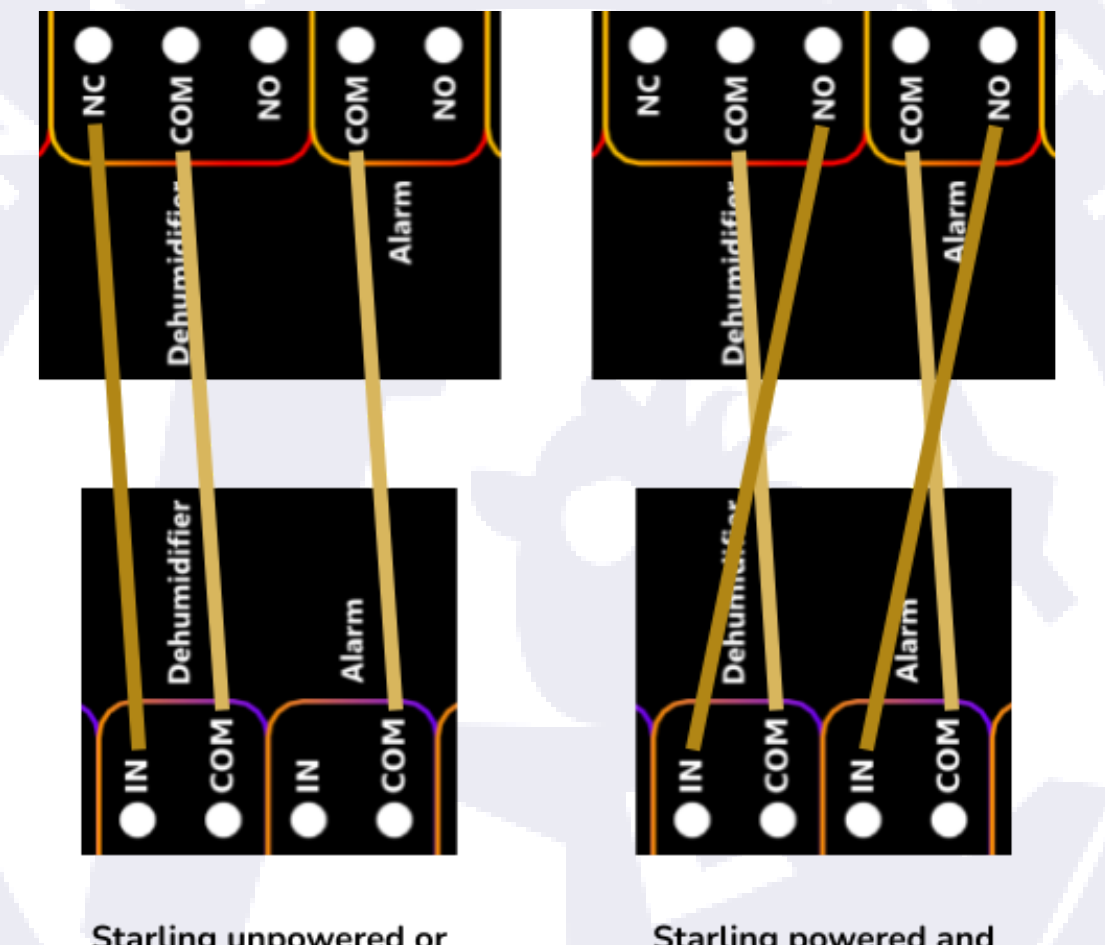
When the Starling is unpowered, all the relays will be in the relaxed (normal) state, so:
- All "NC" contacts, present in the first four relays, will be connected to their matching "IN" (so they'll be closed).
- All "NO" contacts will be, of course, just open.
If there's any doubt, the following image may help:
So now we have all the information we need to wire our devices to the Starling. Note that the names of the three extra devices can be customised in the software (more on this in the control panel section), and you may find it helpful to stick the names of whatever you're plugging in onto the Starling itself.
The key things to remember here are that:
- Neutral (AC) or ground (DC) should be wired to "COM" (common).
- Phase or live (AC) or positive (DC) should be wired to "IN".
Also, for reference, the LED for each relay will be on when the relay is closed.
Note: the box of the unit must be connected to ground (earth). To achieve this, simply wire the banana-style socket to earth.
The rule is simple—all A.C. current appliances should be earthed. Even if all current routed by the Starling is D.C., the box should be earthed. The circular socket on the box is there for that purpose (it's connected to the box itself).
So now you should be able to wire the devices according to the information on the sticker.