
There is a separate document explaining the procedure to enable your SOLO to be accessed from the internet.
2.1 Main web page
From your web browser, type http://aagsolo in the address bar (not in Google!), and you'll see the main SOLO page:
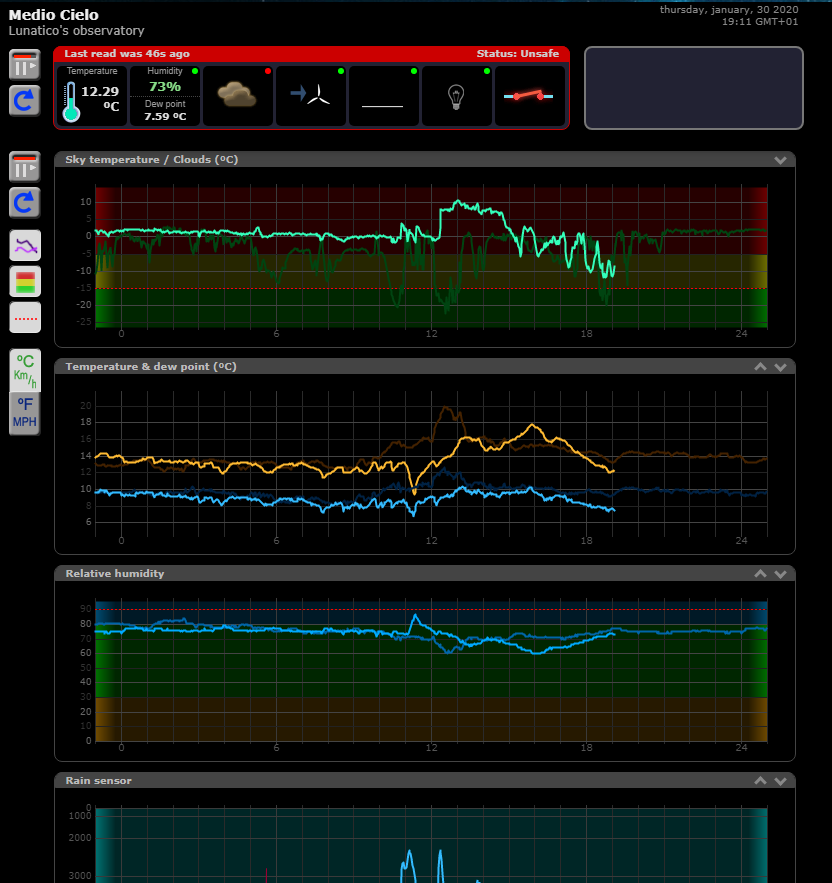
A few things worth explaining on this page:
- In the upper left side, the current readings are displayed. Hovering the mouse pointer over the icons displays the reading numerically.
- At its leftmost side, some buttons: stop/start auto update (refreshes every 60 seconds if enabled), and reload data now.
- In the upper right, a log pane with recent information.
- Covering the rest (and main portion) of the page, graphs with information covering the current day and the day before. Note the arrows at the top right of each graph—you can use them to rearrange the graphs.
- Also at their leftmost side, buttons to: stop/start auto update, reload data now, show/hide yesterday's data, show/hide the three-colour background (matching the 3 levels of each reading), show/hide a dotted line at the current "unsafe" setting, and choose between metric and imperial units.
Last, in the lower right side of the page the language can be changed—for the moment Auto, English and Spanish are available.
This page can be made accessible from the internet; the way of doing so varies from router to router, but basically involves setting up a "NAT" rule for incoming connections at a given port to be redirected to the SOLO—and, of course, the SOLO needs a fixed IP address. You can check a running unit at: aagsolo.lunatico.es:10800.
2.2 Graphs and information explained
The information displayed depends on the sensors installed; currently, the relative humidity sensor and the anemometer are optional, so may be shown or not.
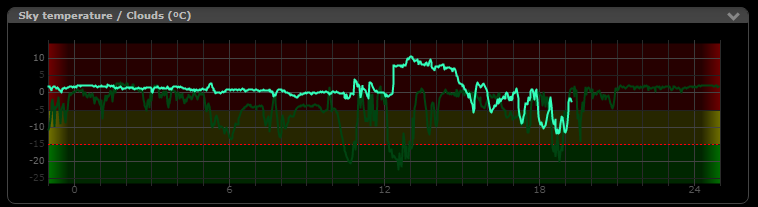
The elements of every graph are very similar: current data is shown in a bright line (green for sky temperature), yesterday's as a more pale line. A dotted orange line marks the boundary between safe and unsafe. The three background colours match the three ranges specified (clear / cloudy / overcast, for sky temperature, etc.).
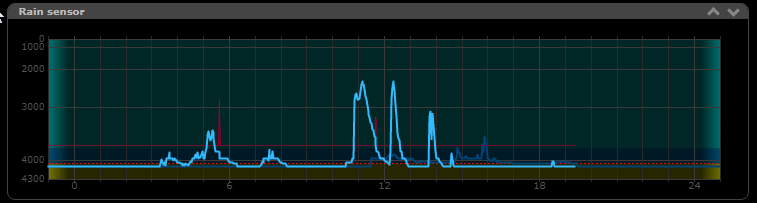
Some graphs have specificities. The rain graph, apart from the rain value (lower values indicate rain), also shows a red line reflecting the sensor heater behaviour—in this example, the activity spikes of the heater match the rain periods.
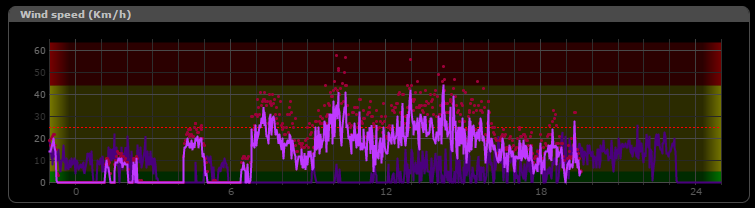
The wind graph (and the icon at the top) shows the average wind speed as a line, and the gust as a dot:
2.3 Single Line Data files
Some programs and drivers—at least CCDAutopilot and CCDCommander in remote mode, and also Lunatico's own and Chris Rowland's ASCOM safety monitor drivers—just need to access a file with weather data formatted in a specific way.
The SOLO publishes this file, so you can add weather safety just by accessing it from the network. Browse the network to the "aagsolo" computer (user "pi", password "cloudwatcher"). If you can't find AAGSolo by browsing the network, just type \\aagsolo in the address bar:
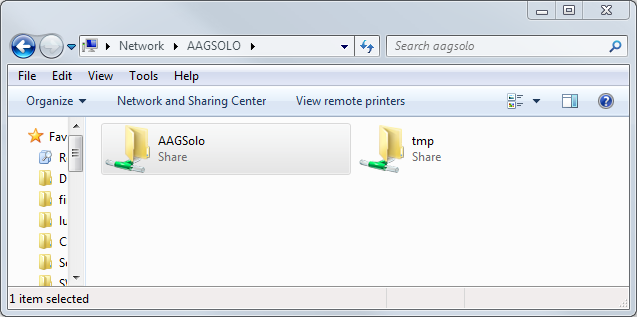
Forget the "tmp" folder, and go to the "AAGSolo" one. There are quite a few files, but it is aag_sld.dat (AAG Single Line Data) that you're looking for:
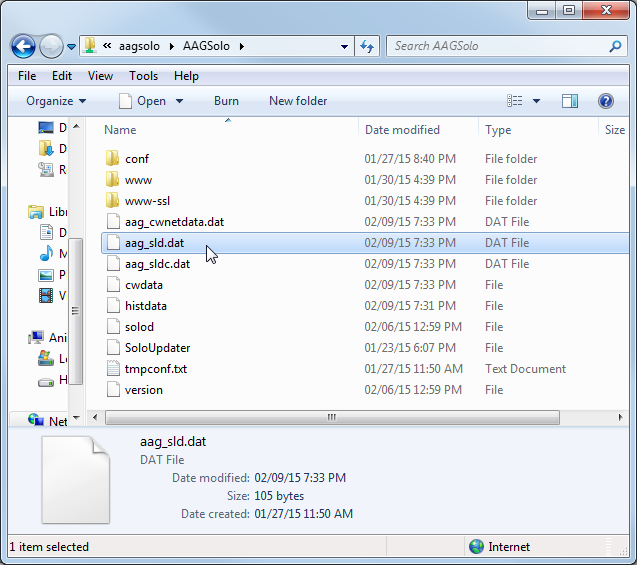
There is also a file called aag_sldc.dat, the same but with a comma "," separating the decimal numbers—at least CCDAP, if installed on a machine with a locale using that comma as the decimal separator, needs this file.
Point your automation software (or ASCOM driver) to this shared folder. Depending on the Windows version, you may have to connect to "aagsolo" from Windows Explorer at least once at the start of every session.
2.4 ScopeDome data file
Accessing the network the same way, you can find a special file for the ScopeDome software, namely scopedome.csv:
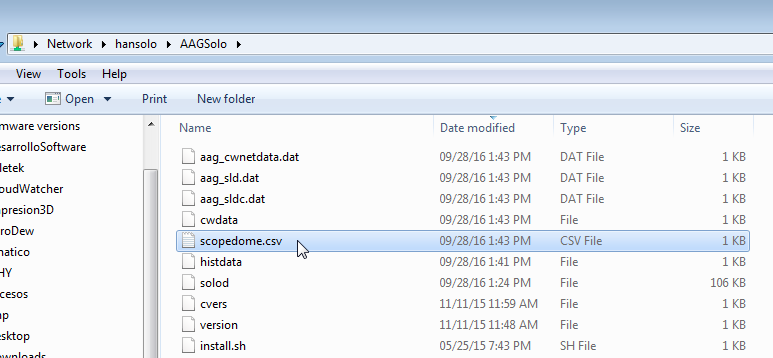
Just select this file in your ScopeDome software, under Config → Cloud Sensor Config → Current Cloud Sensor Status File Name.
2.5 AAG CloudWatcher "Master"
The SOLO also behaves as a CloudWatcher Windows application in Master mode, so you can connect other instances of the Windows software, running as Remote, to the SOLO.
Note: to change your current Windows software from Master to Remote, go to the Setup tab, Network section, and select "remote".
The Windows software running in remote mode needs a special file to read the data from the sensor. Browse the network again to the "aagsolo" machine (user "pi", password "cloudwatcher"), and you'll find the AAG_CWNetData.dat file:
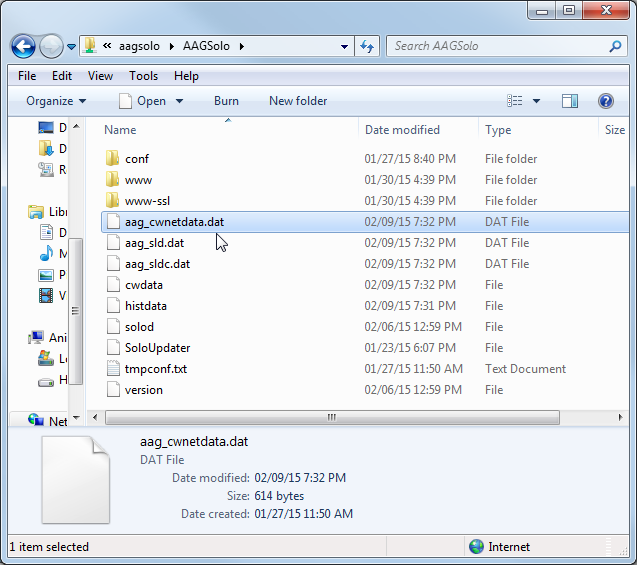
This is the file your "remote" AAG programs will need in order to operate. Selecting the folder containing it, from those remote-mode applications, allows them to run:
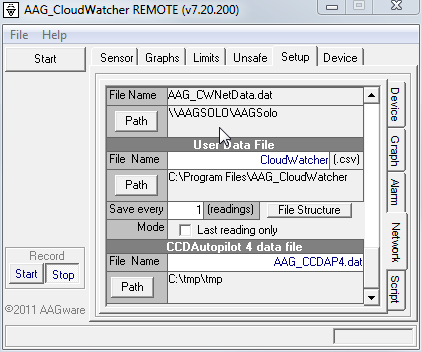
As said before, depending on the Windows version, you may have to connect to "aagsolo" from Windows Explorer at least once at the start of every session.
2.6 Data logger
A useful feature of the SOLO is its ability to record a CSV file to a user-supplied USB stick. Insert, in one of the SOLO's USB ports, a suitably formatted USB memory stick (suitably formatted means FAT—other formats may work if you know what you're doing).
Once the stick is inserted, the SOLO software will detect it, mount it, and start adding information to a CSV file (userdata.csv) in the base folder of the stick—so you just have to insert the stick for the logging to start.
However, to remove the stick, you have to "unmount" it (similar to the Windows "safely remove" operation)—there is an option in the configuration pages to do so.
Final note: the software will append information to the file if it already exists. If you have already taken the file to your computer and want to start afresh, delete it from the USB stick before inserting it again in the SOLO.