
The setup of the Dragonfly is quite straightforward—it may involve, however, dealing with dangerous voltages and currents (depending on your setup); please contact a qualified electrician if you don't have the skills needed to perform a 100% safe setup.
Naming convention: when naming the state of any relay, we'll think of the "NO" output. This applies to the software, too. So, we'll say the relay is OPEN if its NO output is. All relays will be open when unpowered. Conversely, we'll say the relay is CLOSED if its NO output is connected to the input side.
If you take a look at the sticker covering the upper side of your Dragonfly, you'll notice this naming convention used for labelling the input and output connectors:
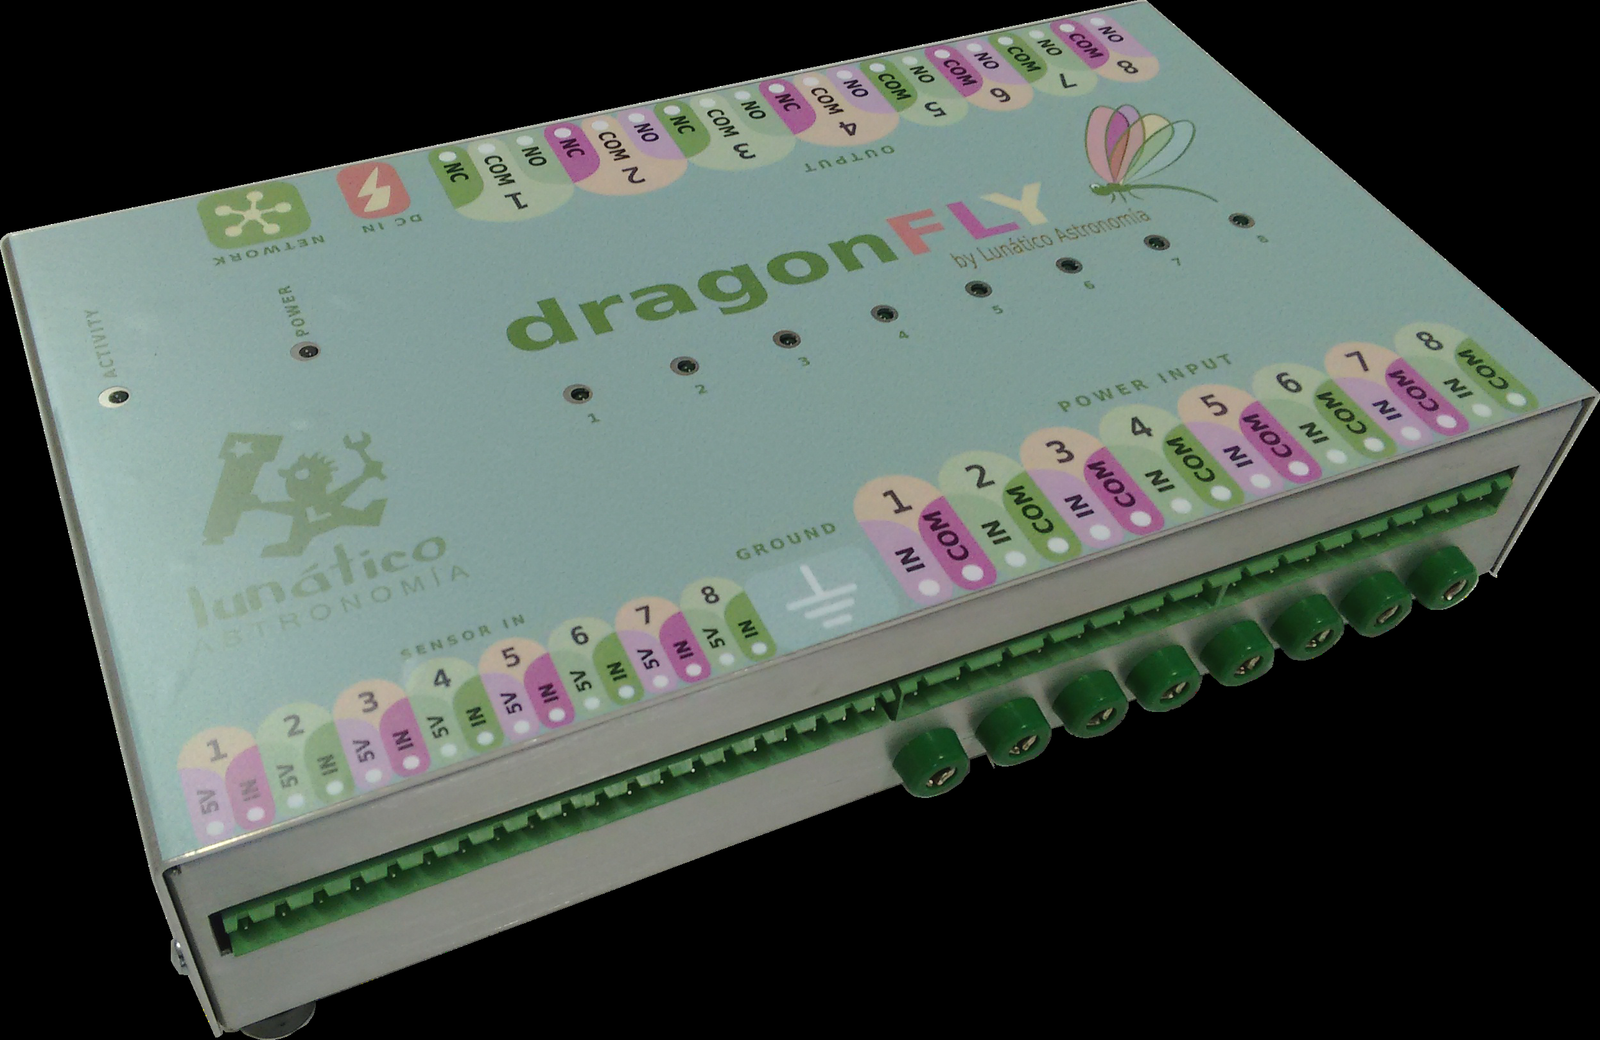
And another thing to notice: Power Input connectors are on the lower side, Power Output ones on the upper side. Current, be it AC mains (max 240V) or DC from a battery or power supply, will enter the Dragonfly via the Power Input and will be blocked or routed to the Output side. On the Output side we'll have our devices: mount, roof, CCD camera or whatever.
How the internal wiring goes
- "COM" will be internally routed from the input to the output side—always.
- "NO" (Normally Open) will be connected to "In" when the relay is closed by the software.
- "NC" (Normally Closed, only available in relays 1 to 4) will be connected to "In" when the relay is open in the software.
When the Dragonfly is unpowered, all the relays will be in the relaxed (normal) state, so:
- All "NC" contacts, present in relays 1 to 4, will be connected to their matching "In" (so they'll be closed).
- All "NO" contacts will be, of course, just open.
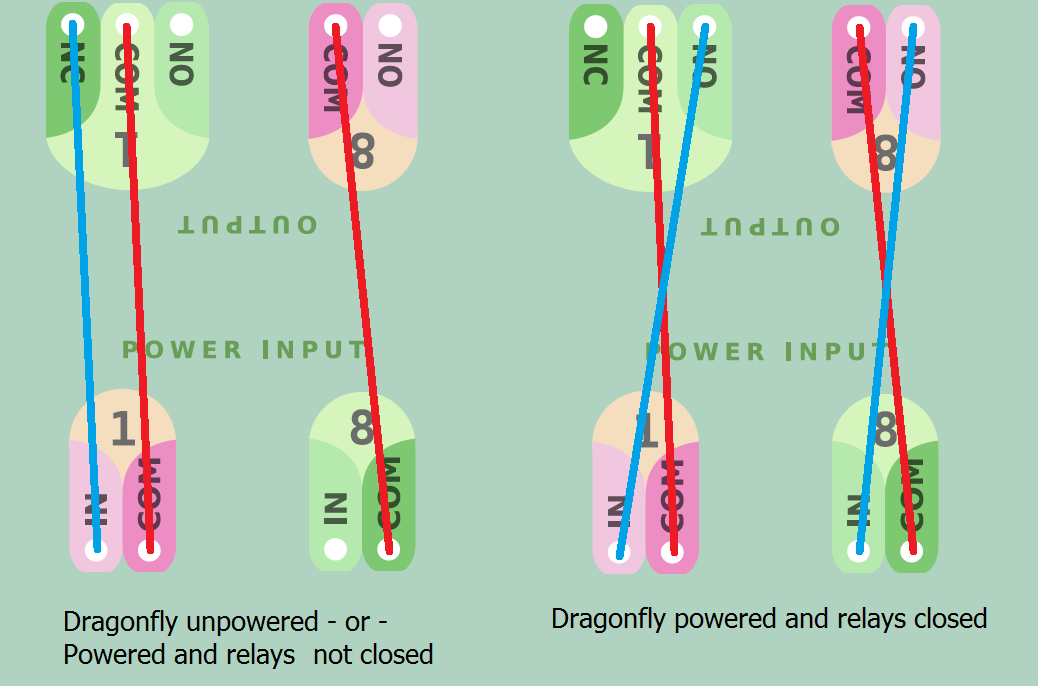
So what are the "NC" contacts for? When designing the Dragonfly, we noticed that certain things should be powered at all times except during the imaging session. One simple example is the observatory lights—you may choose to route the hand switch through the Dragonfly in such a way that no one can accidentally turn on the lights when you are imaging. You can even use the "NO" contact of the same relay to power on some other thing when the lights go off.
In my case, I have an electrical dehumidifier and I want it off for sure before the roof is opened!
Worked example: the minimalist observatory
So let's set up things for our minimalist observatory—adding the dehumidifier:
- Relay 1 → Roof control (pulsed—that is, a push button, as standard in many garage door automation motors)
- Relay 2 → Mount
- Relay 3 → CCD camera
- Relay 4 → Observatory lights
Bear in mind!—at the input side, for each relay:
- neutral (AC) or ground (DC) should be wired to "COM" (common)
- phase or live (AC) or positive (DC) should be wired to "In"
Wiring, input side
- The same for relays 2, 3, and 4: mains neutral to COM, mains phase to IN.
- For relay 1, roof, as we want to "push a push button", we'll wire COM and IN together (just a short wire connecting them both). This case is different, as we do not need to power the roof motor, just to push a button:
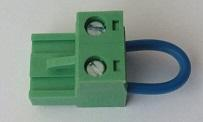
Wiring, output side
- Relay 1: COM and NO to the roof motor push button
- Relay 2: COM and NO to the mount power supply
- Relay 3: COM and NO to the CCD camera power supply
- Relay 4: COM and NC to the observatory lights. Note: in this case it is NC, not NO, as we want the lights working in normal conditions.
Note: the box of the unit must be connected to ground (earth).
The LED for each relay will be on when the relay is closed.
Earthing
The Dragonfly incorporates 8 banana-style plugs at each side to make earthing really simple. They are all connected together and to the metallic box.
The rule is simple: all A.C. current appliances should be earthed. Also, even if all current routed by the Dragonfly is D.C., the box should be earthed; this is accomplished by wiring any of the 16 plugs to earth.
Sensors
Regarding the sensors, they are connected to the "sensor in" section; most of them (proximity, contact, etc.) will just need the "+5v" and "In" connections. For other, more complex sensors (such as our Sharp distance one), ground is also needed; there are 4 ground plugs between the "sensor in" and "power in" strips.
There's a separate instruction sheet on wiring things to the Dragonfly, should you need it—please refer to our website.